The Seeed Studio human presence detection kit is a cheap little box packed with sensors. In this article we will describe initial setup and home assistant integration.
What’s in the box
- 1 Seed Studio MR24HPC1 mmWave Human Detection Sensor Kit
- 1 USB C Cable
- 2 3m adhesive stickers to attach the device to a ceiling or wall
- Small screwdriver
The device specs
- 32bit RISC-V singlecore processor @ 160Mhz
- Complies with IEEE 802.11b/g/n protocol and supports Station mode, SoftAP mode, SoftAP + Station mode, and promiscuous mode
- Supports features of Bluetooth 5 and Bluetooth mesh
- Deep sleep power consumption is about 43μA
- 400KB of SRAM, and 4MB of on-board flash memory
- 5V @ 1A
Installation
-
Install the ‘Esphome’ add-on in home assistant
-
Power on the device using the provided USB-C cable
-
Once powerd on the device will create its own wifi hotspot. Connect to it and point your browser to the device admin ip: 192.168.4.1
-
Select the wifi network you want to connect the kit to and fill out authentication details. The device will reboot. You can close the web page.
-
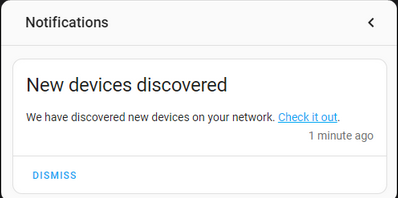
Once the device has joined the Home Assistant LAN it will show up in the Home Assistant web ui:
-
In Home Assistant click on ‘Settings > Devices and Services’
-
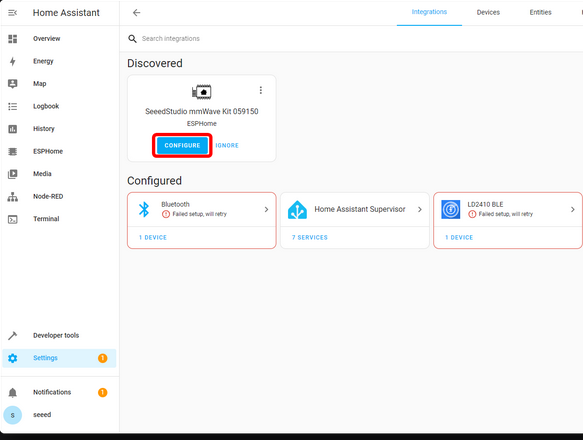
Click ‘Configure’ on the discoverd device:
-
The kit will be added to ESPhome and we can start adding components to the dashboard.
-
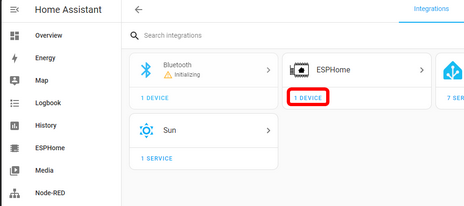
Open up ‘Settings > Integrations’ and select the device listed under ESPhome:
-
Here you’ll see the sensors automatically found by Home Assistant:

-
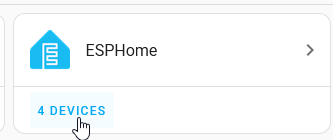
Next add the device to an area in Home Assitant. Open up the Integrations page and click on the devices under ESPhome:
-
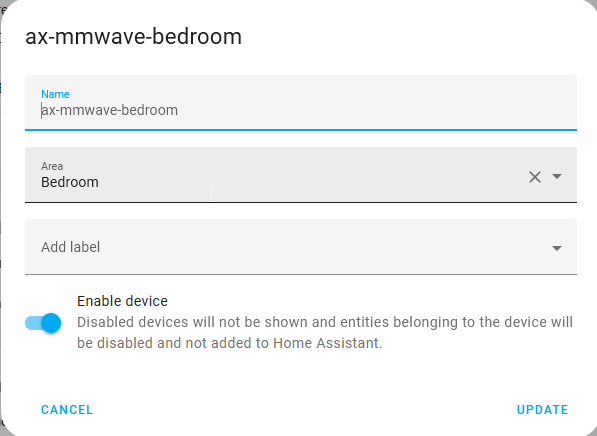
Select your device from the list and click the pencil icon in the top right. Assign the device to an area and rename it if your so inclined:
** Adding more functionality **
By default not all functionality is enabled on the device such as the BLE trackers, update servers and a static ip.
Below is an example yaml file that can be loaded to the device using ESPhome in Home Assitant.
substitutions:
  name: "ax-mmwave-01"
  friendly_name: "ax-mmwave-livingroom"

esphome:
  name: "${name}"
  friendly_name: "${friendly_name}"
  name_add_mac_suffix: false
  platformio_options:
    board_build.flash_mode: dio
    board_build.mcu: esp32c3
  on_boot: #this is to avoid slow startup time because of BT and WiFi "interactions?" , check https://github.com/esphome/issues/issues/2941#issuecomment-1331851692
    priority: 250
    then:
      - delay: 15s
      - lambda: |-
          id(ble_tracker).set_scan_continuous(true);
          id(ble_tracker).start_scan();

external_components:
  - source: github://limengdu/mmwave-kit-external-components@main
    refresh: 0s

esp32:
  board: esp32-c3-devkitm-1
  variant: esp32c3
  framework:
    type: esp-idf

# Enable logging
logger:
  hardware_uart: USB_SERIAL_JTAG
  level: DEBUG

# Enable Home Assistant API
api:
  encryption:
    key: "YOUR-HOME-ASSISTANT-API-KEY"

ota:
  - platform: esphome
    password: "YOUR-ESP-HOME-PASSWORD"


wifi:
  ssid: !secret wifi_ssid
  password: !secret wifi_password

#Set static ip
  manual_ip:
    static_ip: 192.168.1.10
    gateway: 192.168.1.254
    subnet: 255.255.255.0
    dns1: 192.168.1.254


captive_portal:

# Sets up Bluetooth LE (Only on ESP32) to allow the user
# to provision wifi credentials to the device.
esp32_improv:
  authorizer: none

# Sets up the improv via serial client for Wi-Fi provisioning.
# Handy if your device has a usb port for the user to add credentials when they first get it.
# improv_serial: # Commented until improv works with usb-jtag on idf

uart:
  id: uart_bus
  baud_rate: 115200
  rx_pin: 4
  tx_pin: 5
  parity: NONE
  stop_bits: 1

seeed_mr24hpc1:
  id: my_seeed_mr24hpc1

bluetooth_proxy:
  active: true

esp32_ble_tracker:
  id: ble_tracker
  on_ble_advertise:
      then:
        - lambda: |-
            ESP_LOGD("ble_adv", "New BLE device");
            ESP_LOGD("ble_adv", "  address: %s", x.address_str().c_str());
            ESP_LOGD("ble_adv", "  name: %s", x.get_name().c_str());
            ESP_LOGD("ble_adv", "  Advertised service UUIDs:");
            for (auto uuid : x.get_service_uuids()) {
                ESP_LOGD("ble_adv", "    - %s", uuid.to_string().c_str());
            }
            ESP_LOGD("ble_adv", "  Advertised service data:");
            for (auto data : x.get_service_datas()) {
                ESP_LOGD("ble_adv", "    - %s: (length %i)", data.uuid.to_string().c_str(), data.data.size());
            }
            ESP_LOGD("ble_adv", "  Advertised manufacturer data:");
            for (auto data : x.get_manufacturer_datas()) {
                ESP_LOGD("ble_adv", "    - %s: (length %i)", data.uuid.to_string().c_str(), data.data.size());
            }

text_sensor:
  - platform: seeed_mr24hpc1
    heart_beat:
      name: "Heartbeat"
    product_model:
      name: "Product Model"
    product_id:
      name: "Product ID"
    hardware_model:
      name: "Hardware Model"
    hardware_version:
      name: "Hardware Version"
    keep_away:
      name: "Active Reporting Of Proximity"
    motion_status:
      name: "Motion Information"
    custom_mode_end:
      name: "Custom Mode Status"

binary_sensor:
  - platform: seeed_mr24hpc1
    has_target:
      name: "Presence Information"


sensor:
  - platform: seeed_mr24hpc1
    custom_presence_of_detection:
      name: "Static Distance"
    movement_signs:
      name: "Body Movement Parameter"
    custom_motion_distance:
      name: "Motion Distance"
    custom_spatial_static_value:
      name: "Existence Energy"
    custom_spatial_motion_value:
      name: "Motion Energy"
    custom_motion_speed:
      name: "Motion Speed"
    custom_mode_num:
      name: "Current Custom Mode"


switch:
  - platform: seeed_mr24hpc1
    underly_open_function:
      name: Underlying Open Function Info Output Switch

button:
  - platform: seeed_mr24hpc1
    restart:
      name: "Module Restart"
    custom_set_end:
      name: "End Of Custom Mode Settings"

select:
  - platform: seeed_mr24hpc1
    scene_mode:
      name: "Scene"
    unman_time:
      name: "Time For Entering No Person State (Standard Function)"
    existence_boundary:
      name: "Existence Boundary"
    motion_boundary:
      name: "Motion Boundary"

number:
  - platform: seeed_mr24hpc1
    sensitivity:
      name: "Sensitivity"
    custom_mode:
      name: "Custom Mode"
    existence_threshold:
      name: "Existence Energy Threshold"
    motion_threshold:
      name: "Motion Energy Threshold"
    motion_trigger:
      name: "Motion Trigger Time"
    motion_to_rest:
      name: "Motion To Rest Time"
    custom_unman_time:
      name: "Time For Entering No Person State (Underlying Open Function)"
Updating device firmware
In order to install the above yaml file to the device simply open up ESPhome in Home Assistant and select ‘Edit’ under the device you want to make changes to:
`

Paste the above into the config but be carefull to not replace the API/OTA/Wifi and IP settings unless you know what you’re doing. Once done hit ‘Save’ and then ‘Install’. ESPhome will try to push the new config to the device wirelessly.